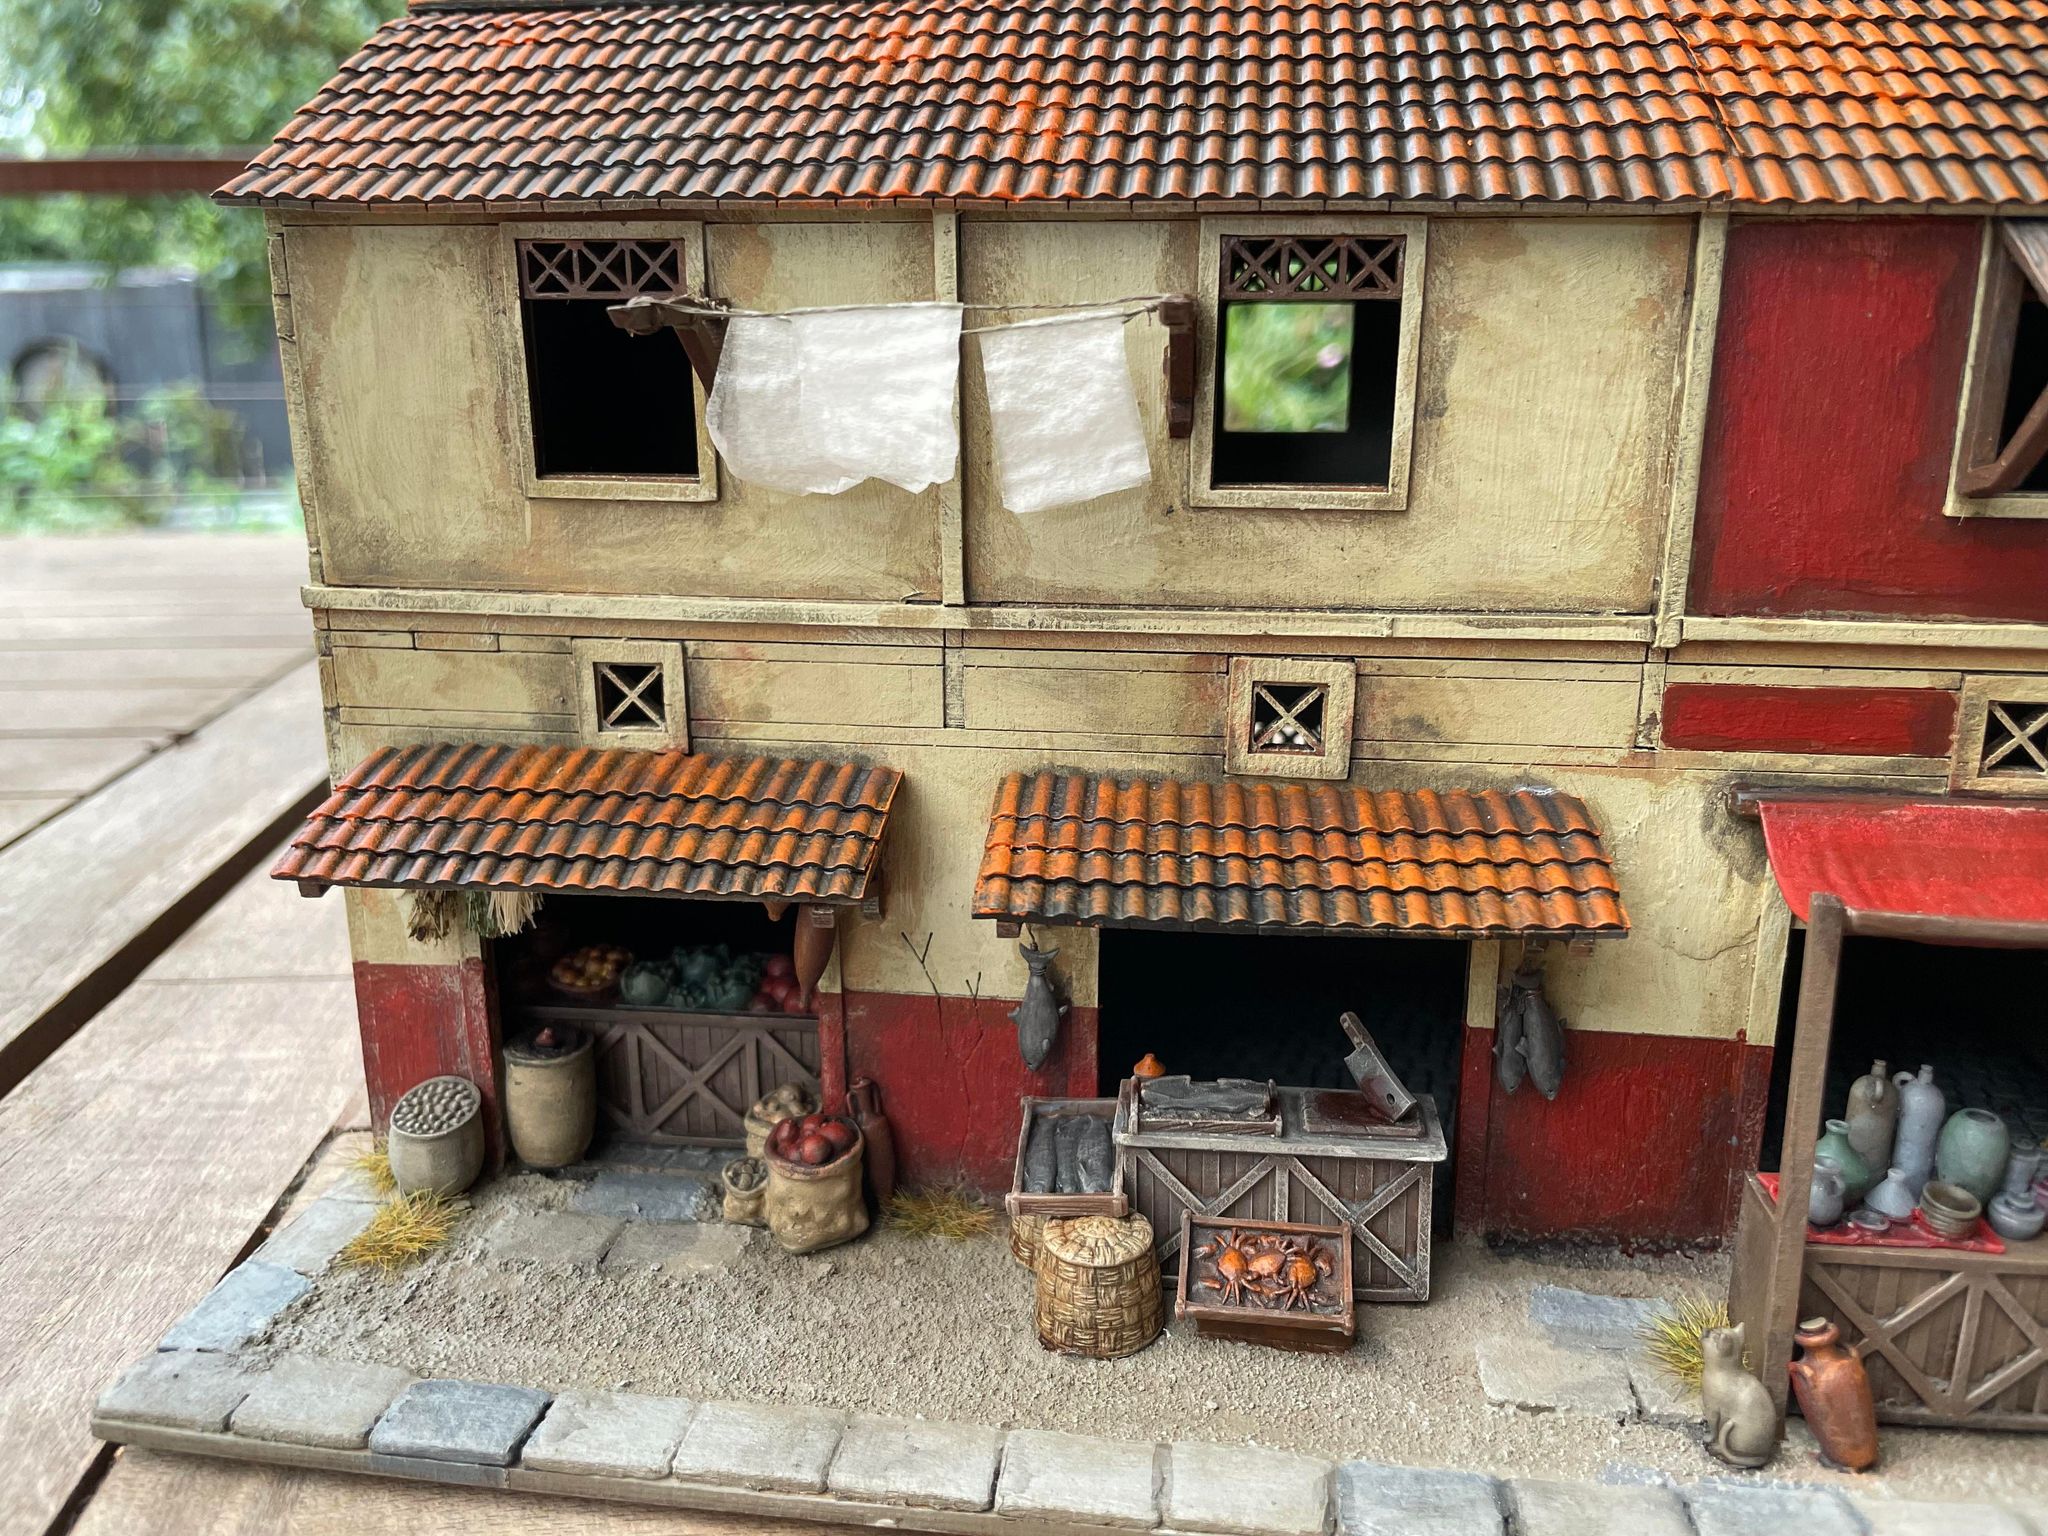
The second building I've completed for my Gangs of Rome table is a blue coloured wine bar or popina, whichI have named the Blue Cock, in honour of a chain of Australian "fine dining" restaurants. These establishments were present throughout all Roman settlements in vast numbers, catering most likely to the food needs of plebeians and slaves - those that could not afford a kitchen at home. The kit is from Sarissa Pecision, the Semi Detached Small Mixed Shop/Domus, the exact building as the pottery shop.
I've been asked by a few people to give some more details about the processes I use in these builds, so after the images of the completed popina below, you will find a basic but extensive tutorial. Nothing here is ground breaking and everything uses fairly straight forward techniques. I hope some people find it useful and would love to hear about it in the comments.


TUTORIAL
LAYING THE STONES
One of the first steps I undertake is preparing the stone floor of the open shop area. This needs to be done as the first step as it becomes impossible to be done later with the walls up.
 |
Dry-fit the walls surrounding the area and using a pencil mark the outline of the room. Ensure you mark the INSIDE dimensions of the room.
|
 |
Dampen the marked area lightly with water.
|
Apply modelling clay (DAS) to the damp area and spread it out as best you can.
 |
Using a damp roller (I use a bit of copper pipe), roll out the clay to fill the area,
aiming for a thickness of roughly 2mm. The more level the clay is the better it will take texture.
|
 |
Trim the overhanging clay back to your pencil marks.
|
 |
You should end up with something like this.
|
 |
Take your roller of choice - I use Greenstuff World's Sett Pavement.
|
 |
Dampen the texture roller and firmly roll it over the clay.
Ensure the roller is exactly parallel to the base (you can see mine wasn't exactly).
Uneven areas will not take the texture as well.
|
 |
You may have to trim the clay again if any has now moved past your lines. Dry fit the walls again to ensure the clay will not be in their way.
|
ASSEMBLY & EDGING
 |
Assemble the kit as per the Sarissa instructions.
|
 |
I have never needed clamps or elastic bands, but I've used the occasional weight.
Use as little glue (PVA - not super glue) as you can - a smear will seriously do.
|
 |
NEVER throw your MDF "sprues" away. NEVER.
I use some bits here to add more dimension to the building front.
|
 |
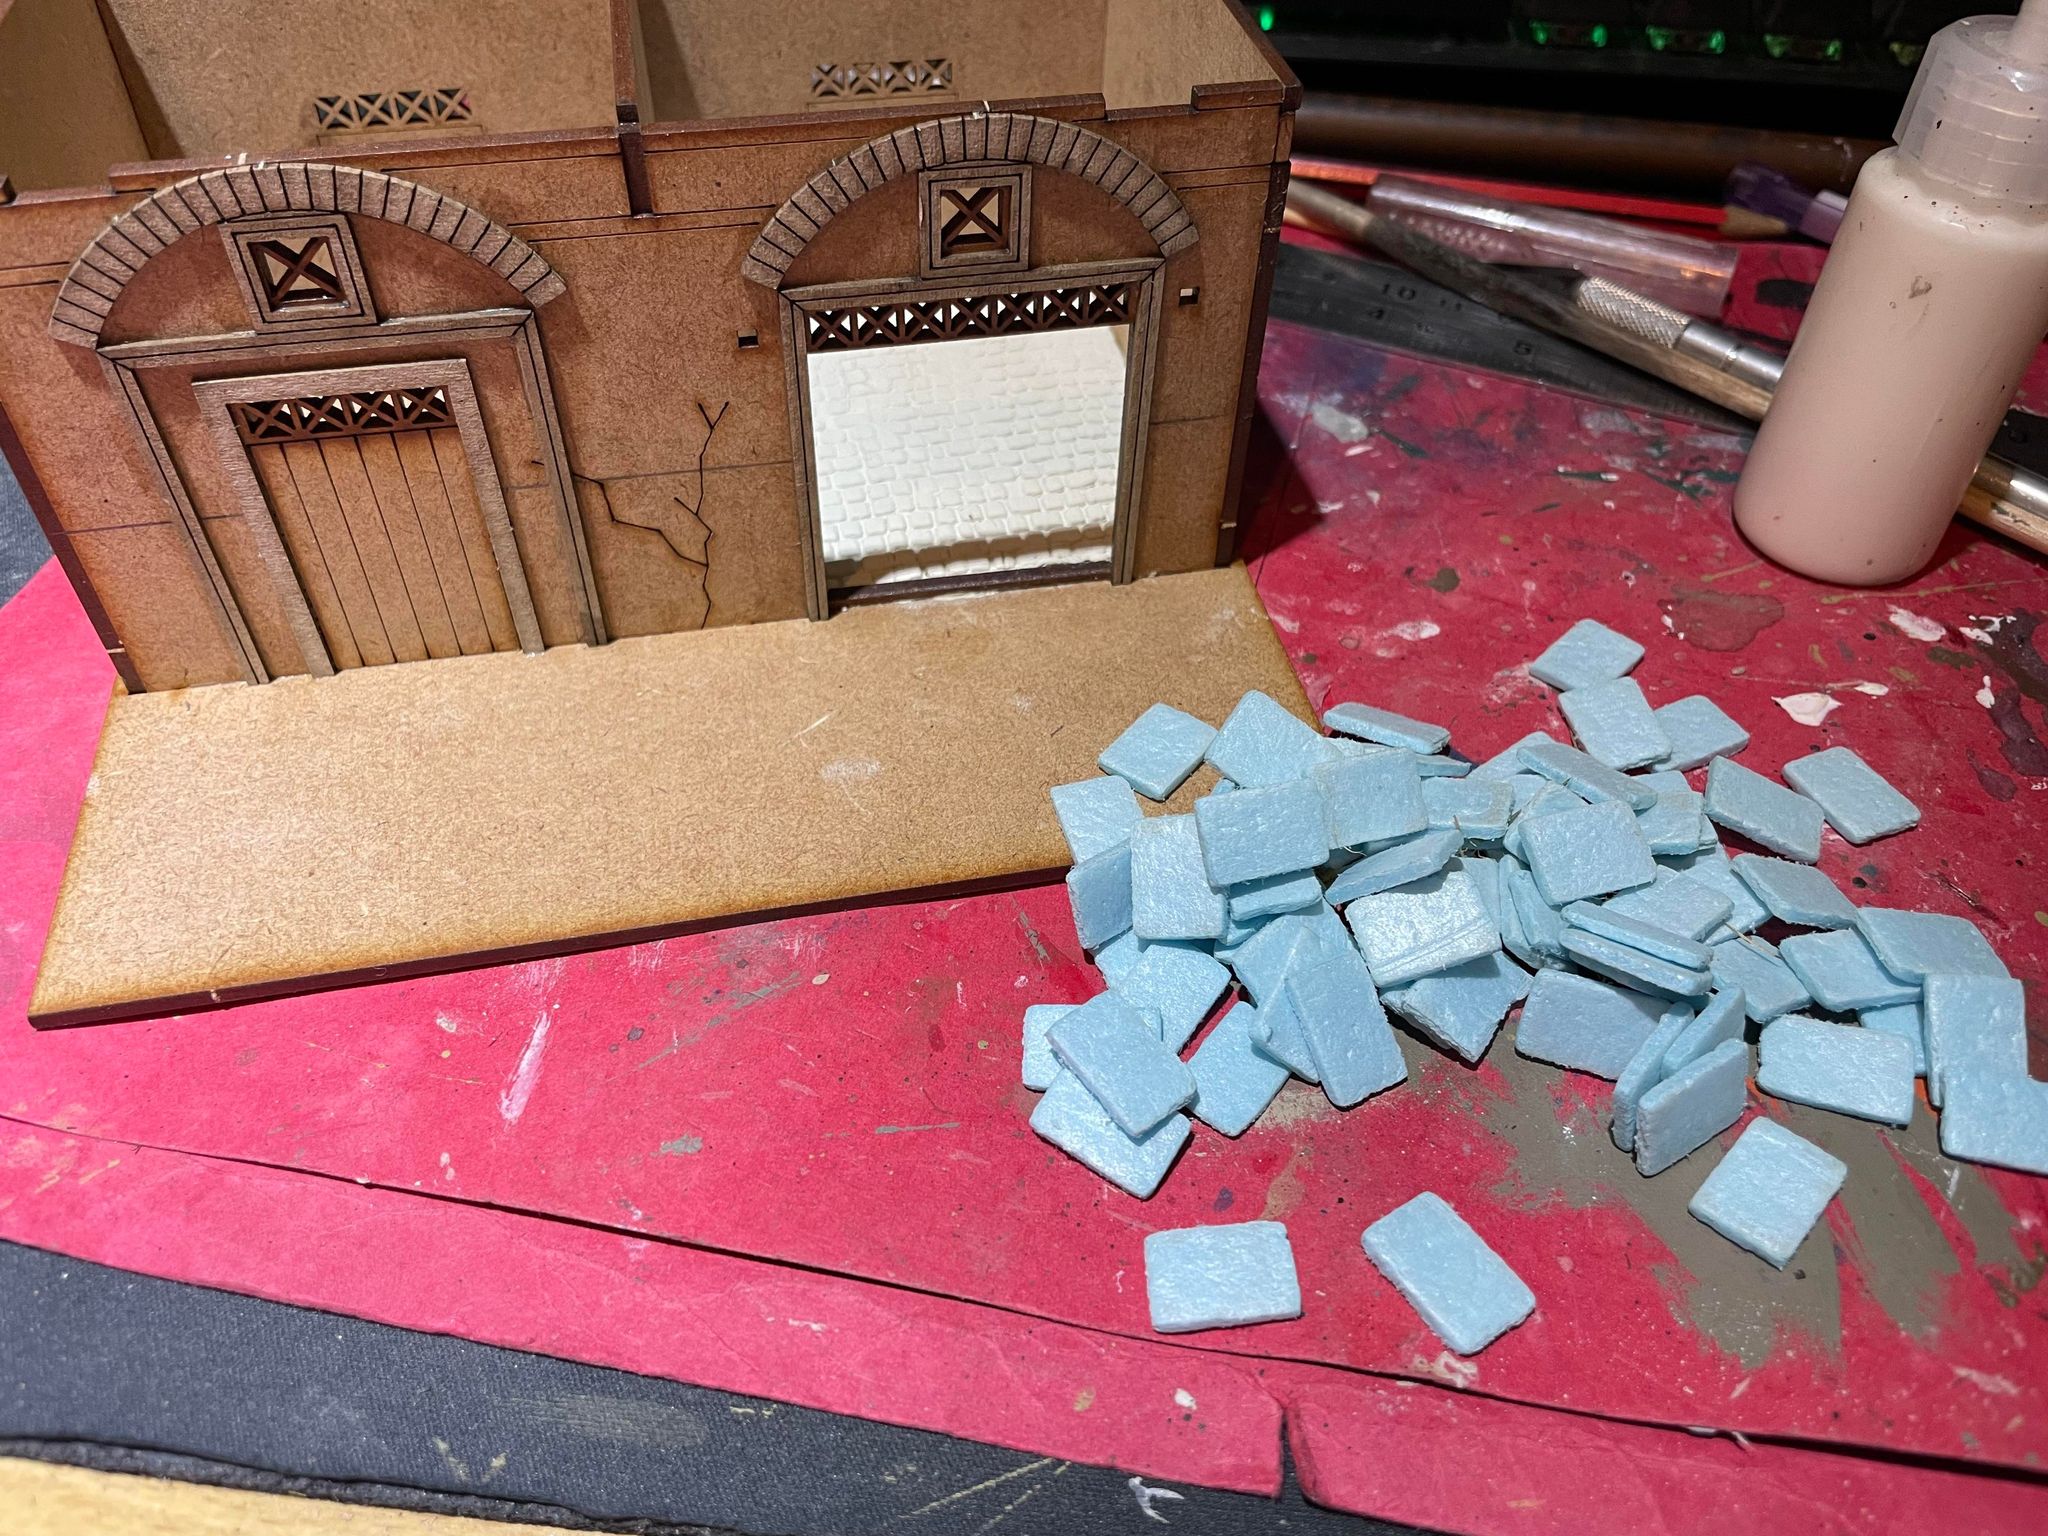
For the edges of the pavement I use foam bricks cut with a wire cutter (2mm thick)
and tumbled in a container with gravel - to nicely round their edges.
|
 |
Starting at the corners, I simply glue the bricks in place, ensuring they are flush with the edge.
|
 |
I place a couple of bricks within for interest and then add a level of filler. This doesn't end up flush with the brick level but pretty close. There will be another layer of grout to come later.
|
PAINTING
Some people have reservations about painting MDF but I have never had any issues and actually really like the tones I can achieve with it. I never prime MDF because I like the natural MDF colour to bleed through the paint which assists me in weathering. I only use house paint test pots from the hardware and most defiantly those on sale in the "mismatched" pile.
For my Rome buildings I did go looking for a "Suede" paint at my local Bunnings Hardware store which is a type of textured paint with granules in it. Sadly this has been discontinued so I had to make my own. I did this by adding about 5 tablespoons of fine sand to a tester pot of off-white paint. This gives the slightest hint of texture and avoids the need for applying filler.
 |
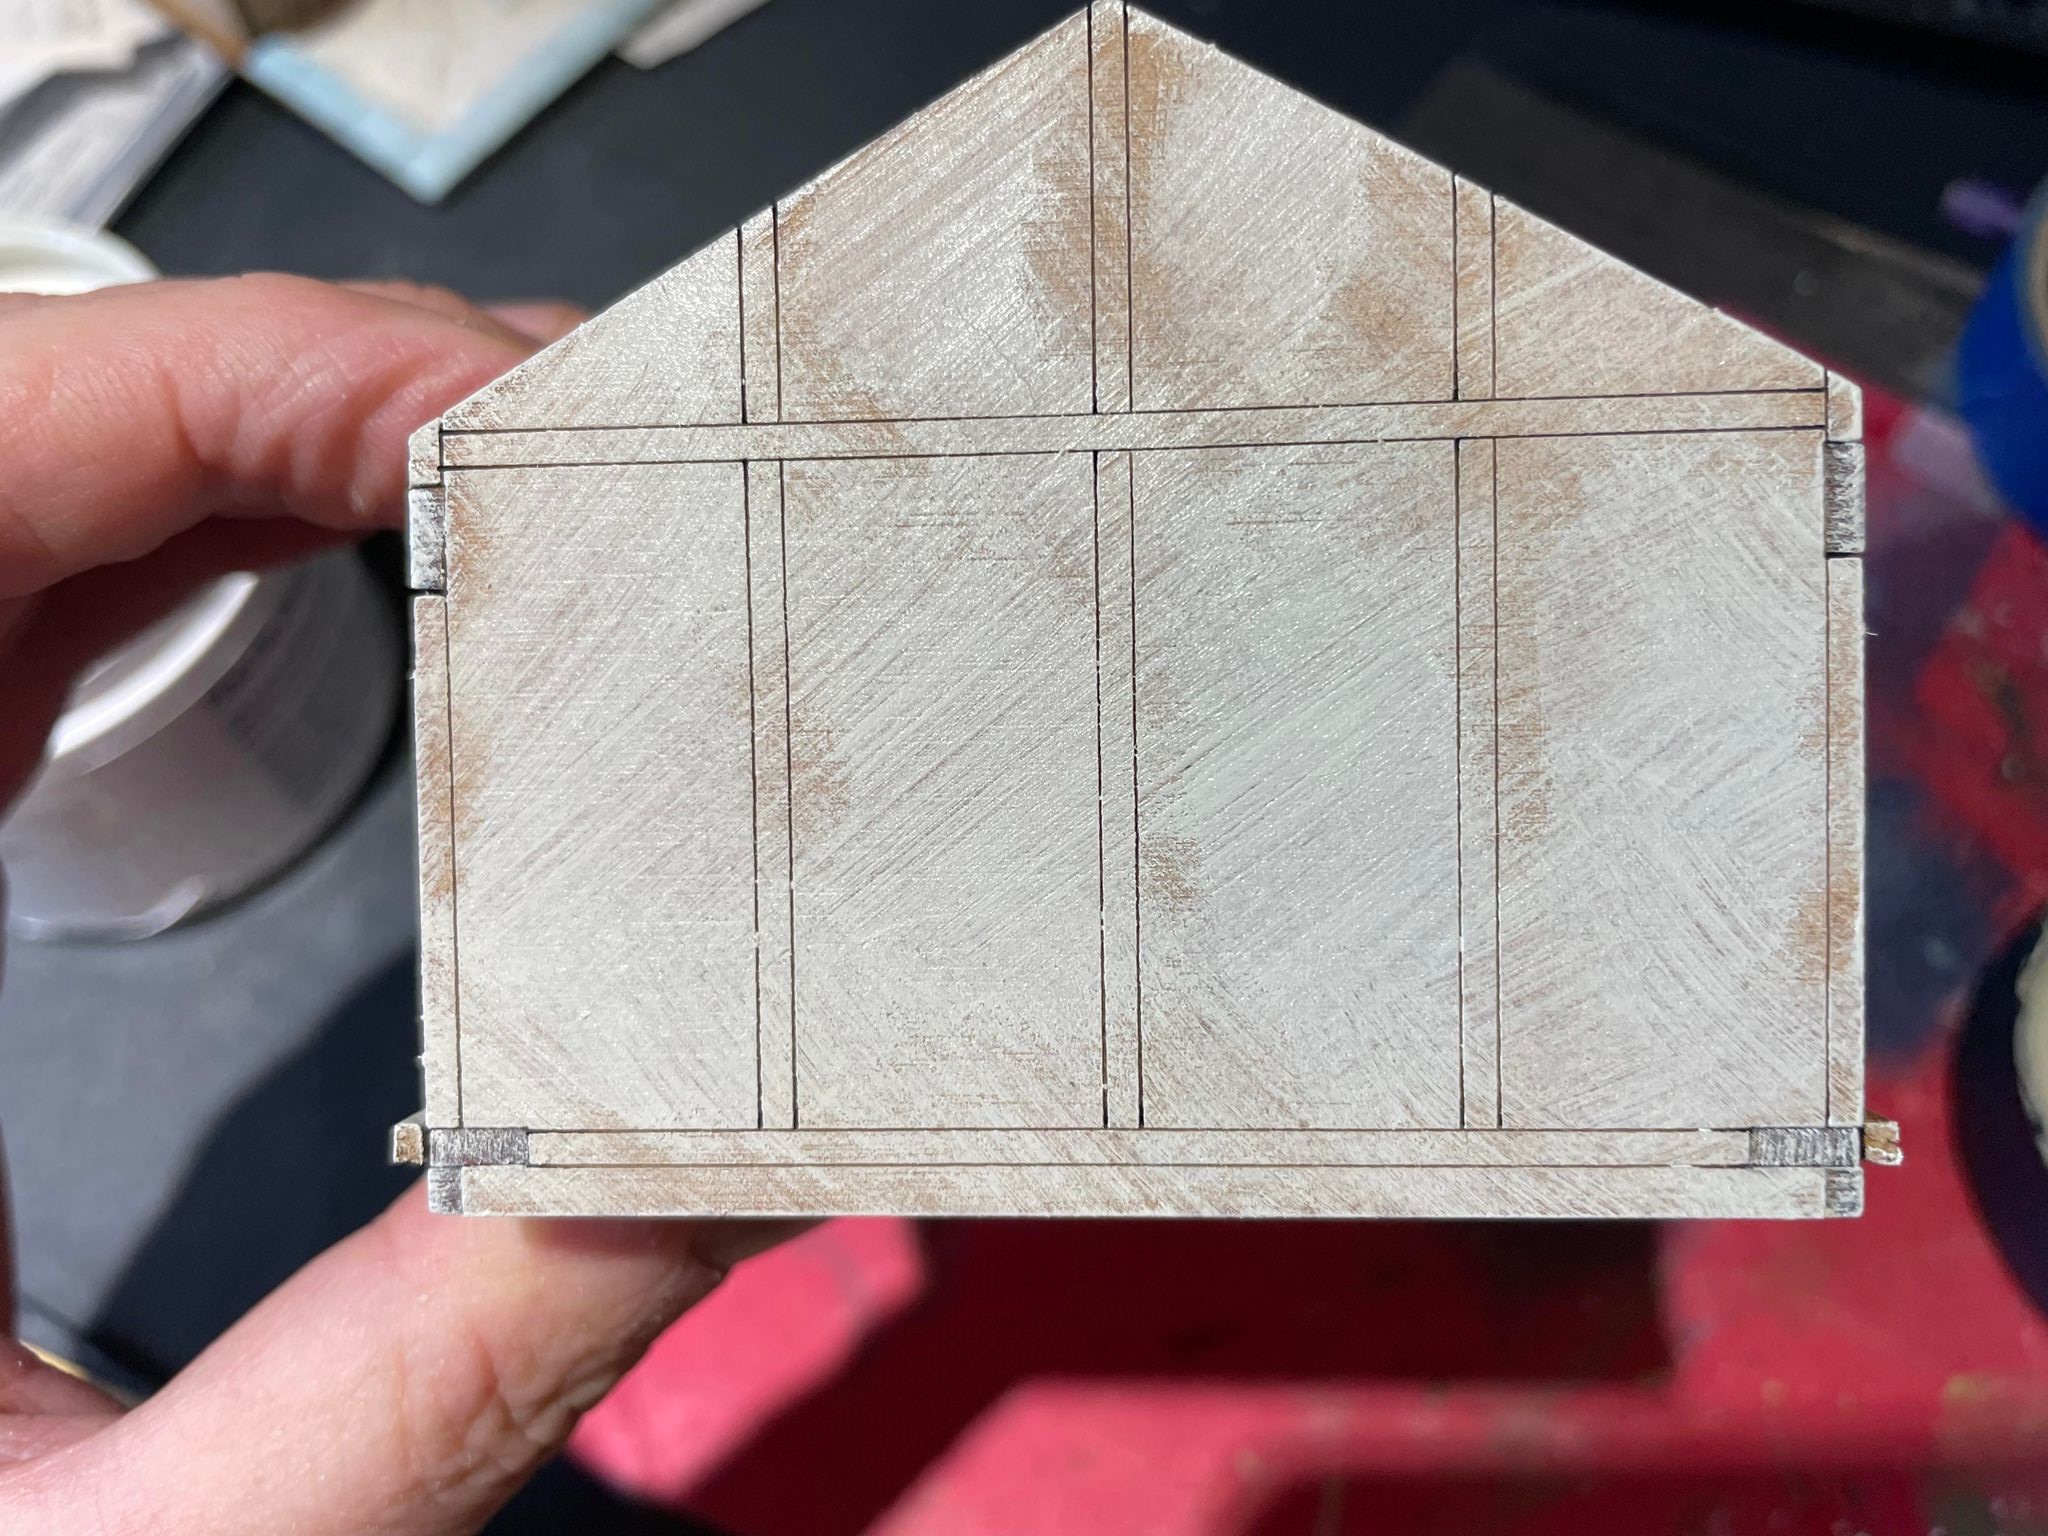
A start by adding a small dollop of paint to the center of the wall panels, avoiding edges and corners.
|
 |
I distribute the paint until the brush has little left on it - basically a heavy drybrush.
|
 |
I use a criss-cross motion, still mostly avoiding the edges and corners,
allowing the MDF colour to show through there.
|
|
|
|
|
|
|
|
 |
Now go back and apply heavier coats to your liking, starting in the wall panel centers again and feathering the paint out, again avoid the very edges and corners.
|
 |
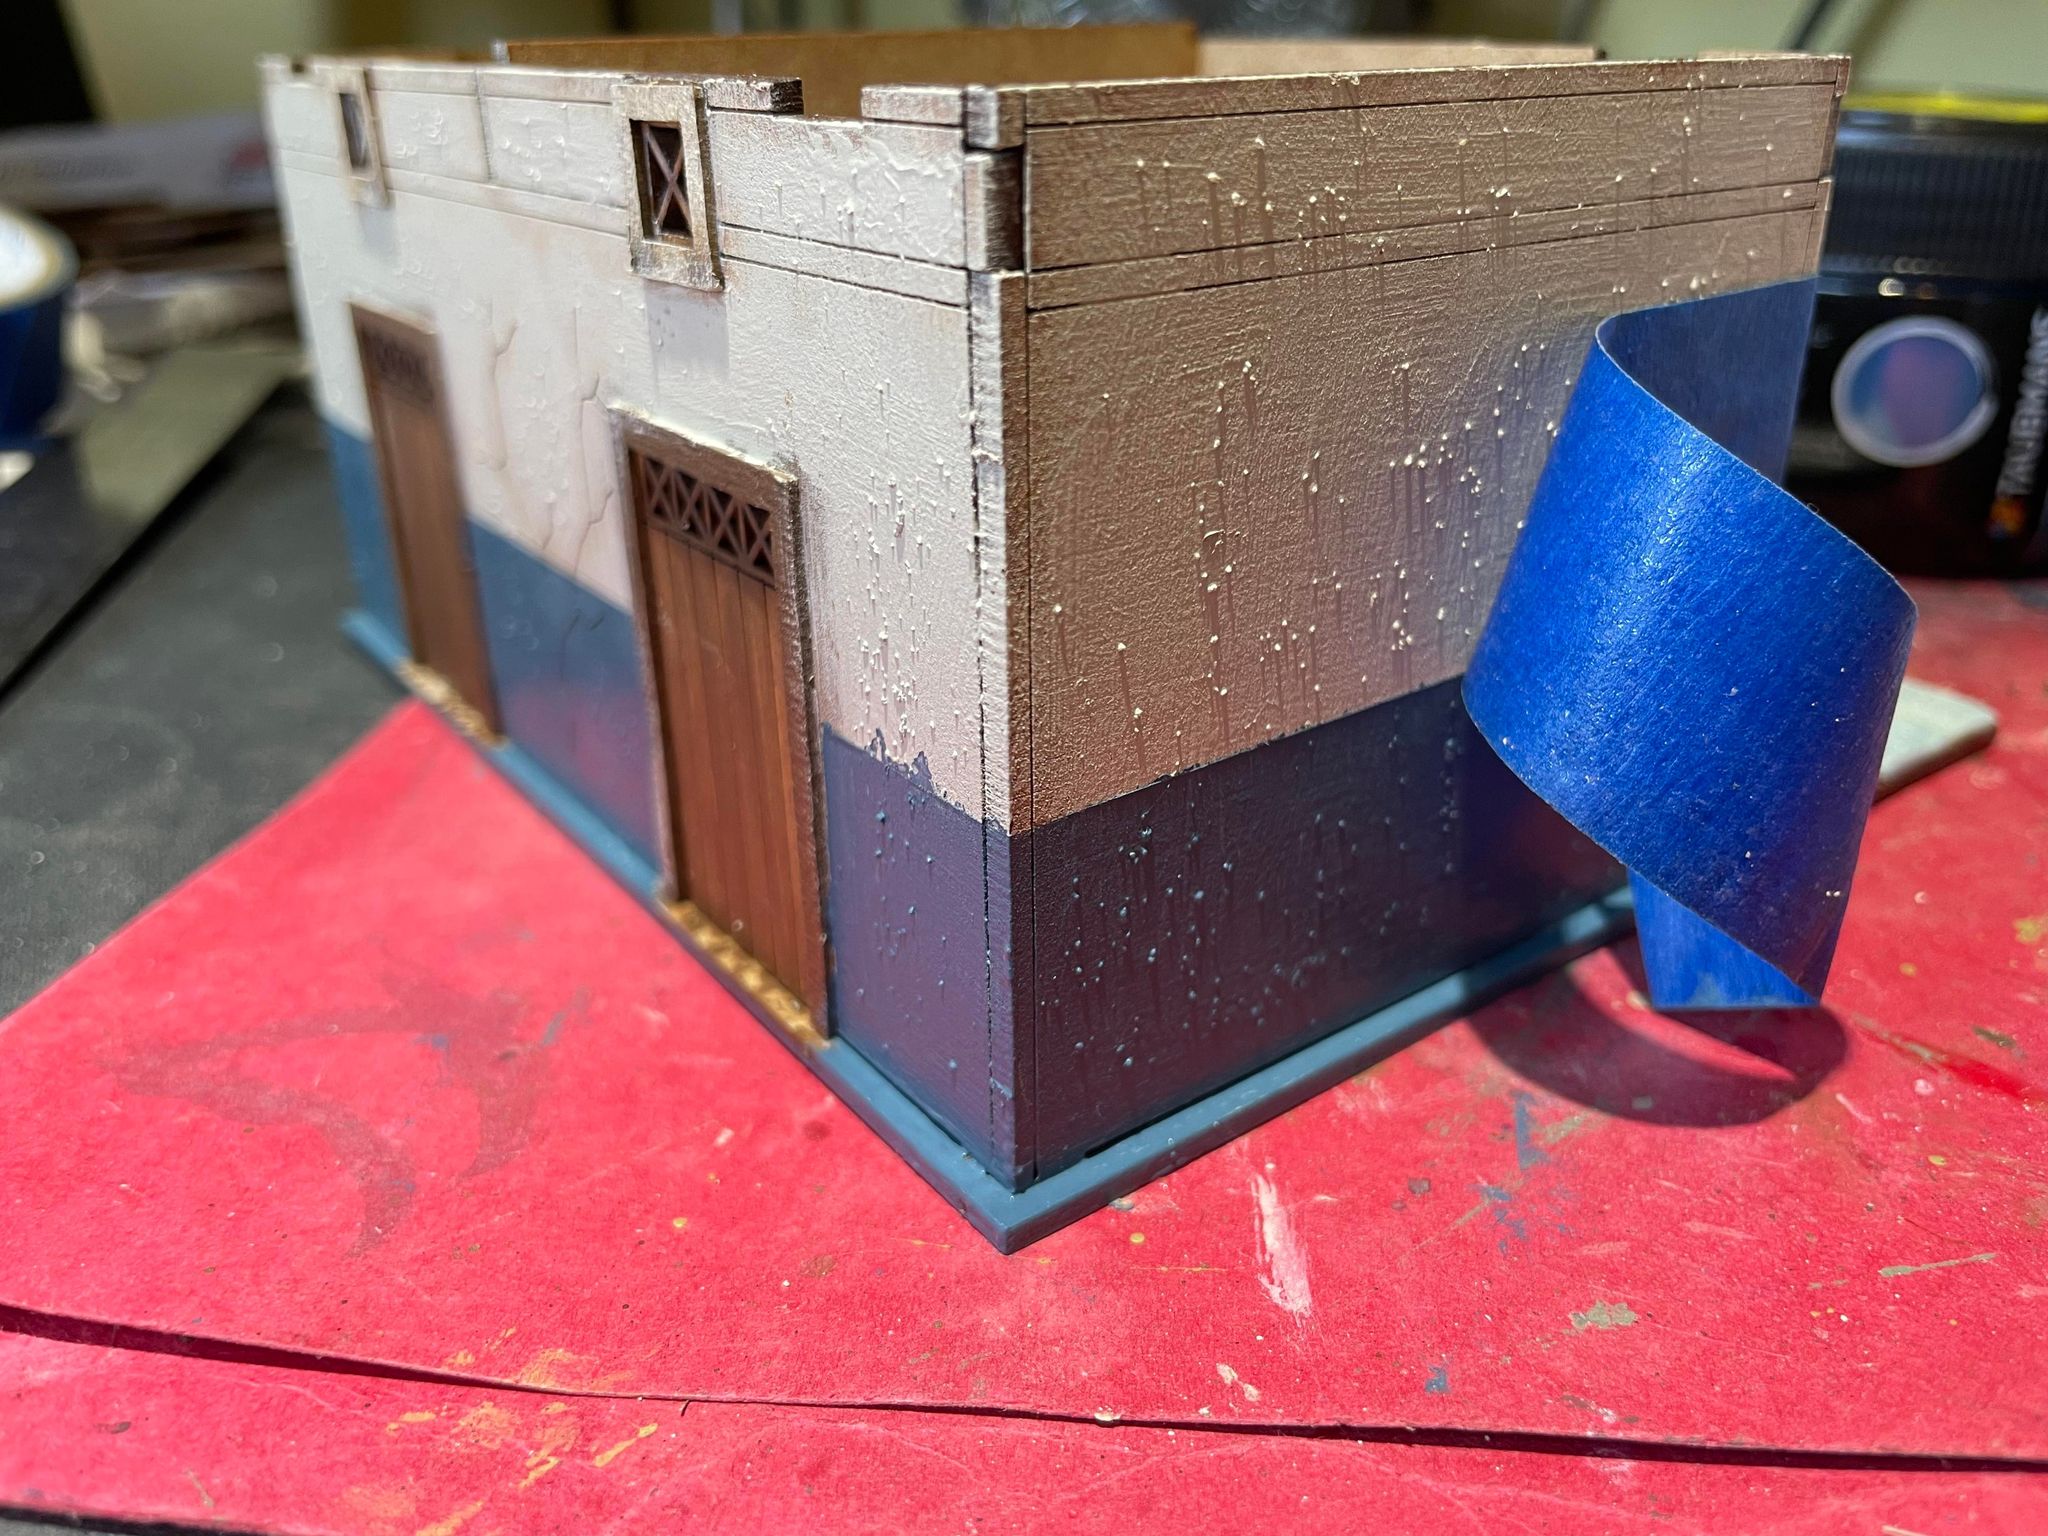
If you want to add a second colour to the building mark out some lines and apply painter's tape.
|
 |
You may have to touch up some areas of white but could likely leave any mistakes as well.
|
 |
The painting done. I weather the building as a final step,
mainly in the corners and edges, mostly with a brown wash and then less so with a black wash.
|
PAVEMENT
After considering using a cobblestone effect on the pavements I settled on a hard packed surface instead. I have seen this referenced in images and I don't know if this is historically correct but I prefer it over more cobblestone.
 |
Apply a generous layer of PVA and then use a mix of tiler's grout and a small amount of fine sand.
|
 |
| Tap off any excess grout and then give it a light spray with water to set it. When this is dry I give it another hit with watered down PVA as this will mostly form the playing surface. |
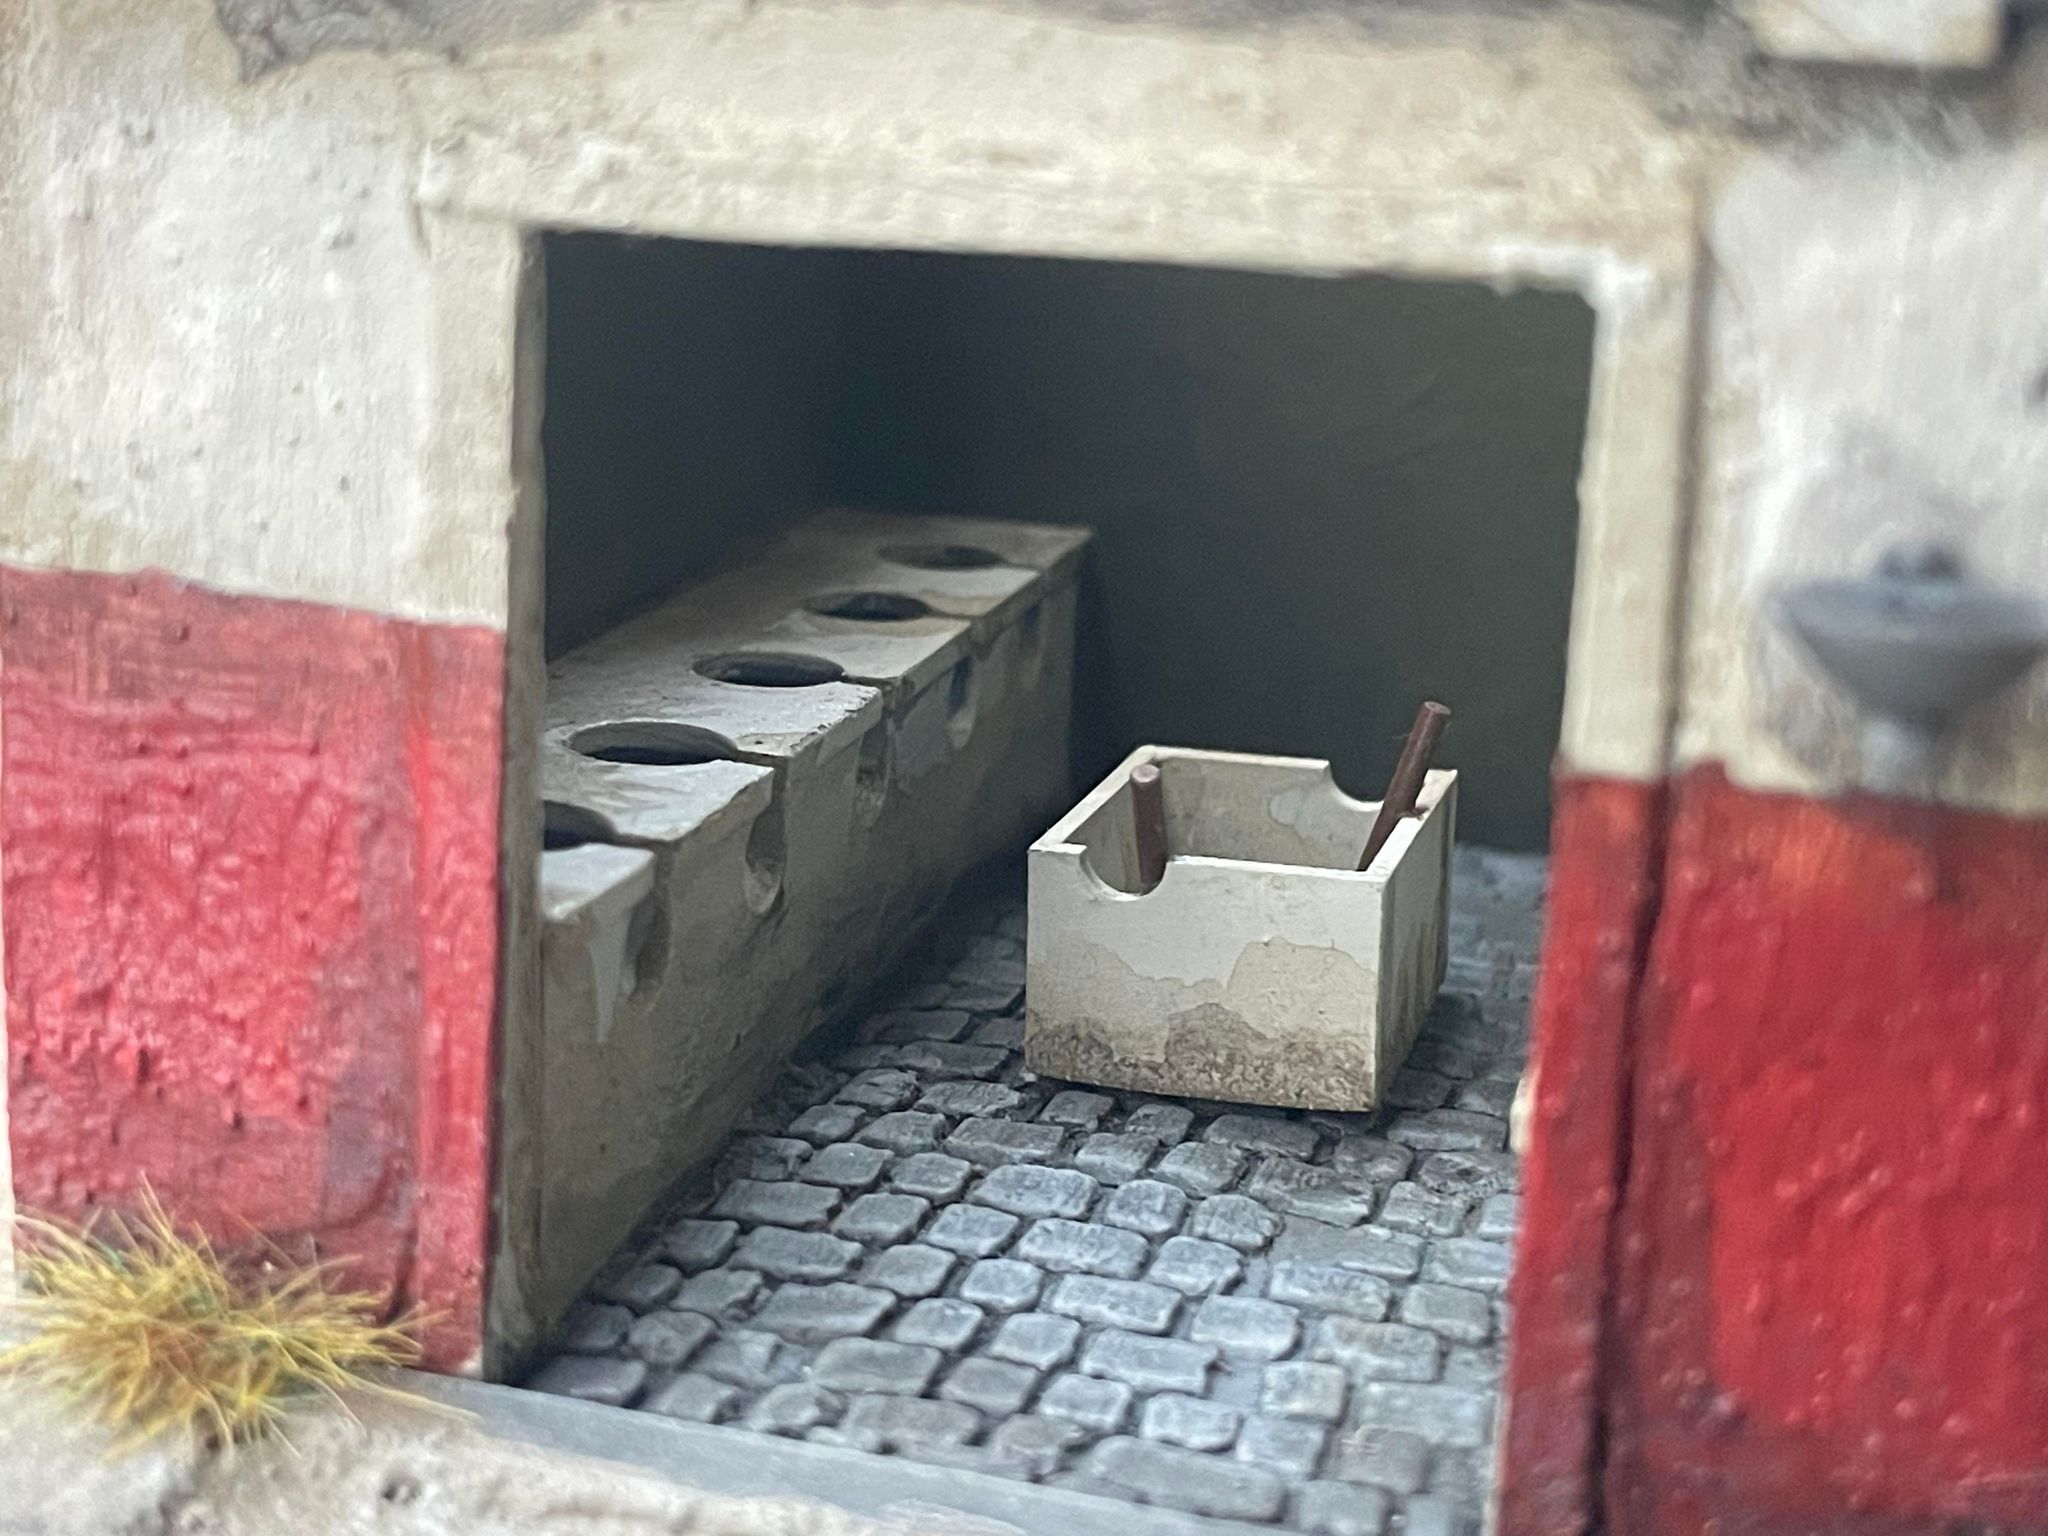
ADDING DETAILS
Adding in all of the little details is probably the most fun part of these builds for me - but is surprisingly time consuming. I have to remind myself that this is not a dollhouse or museum diorama - it is a piece of wargaming terrain. This is why I am only "dressing" the areas that are visible - I am not furnishing the entire building and have no desire to do so. Also, I am not too concerned if models can no longer physically fit in the spaces as these are relatively small areas anyway.
Sourcing the necessary details can be difficult - you must source the pieces you want and then ensure they fit comfortably within. This is easier if you have access to a resin 3D printer but there are some companies selling appropriate accessories (
Irongate Scenery is a good one).
 |
Once you have the accessories see how they all work together.
|
 |
Put all the pieces you have in place to test the layout. Don't overcrowd the space with stuff and don't be afraid to leave some stuff out. Make it look as natural as possible.
|
 |
Paint all the details before you fix them in place.
I use super glue and use tweezers to help position them.
|
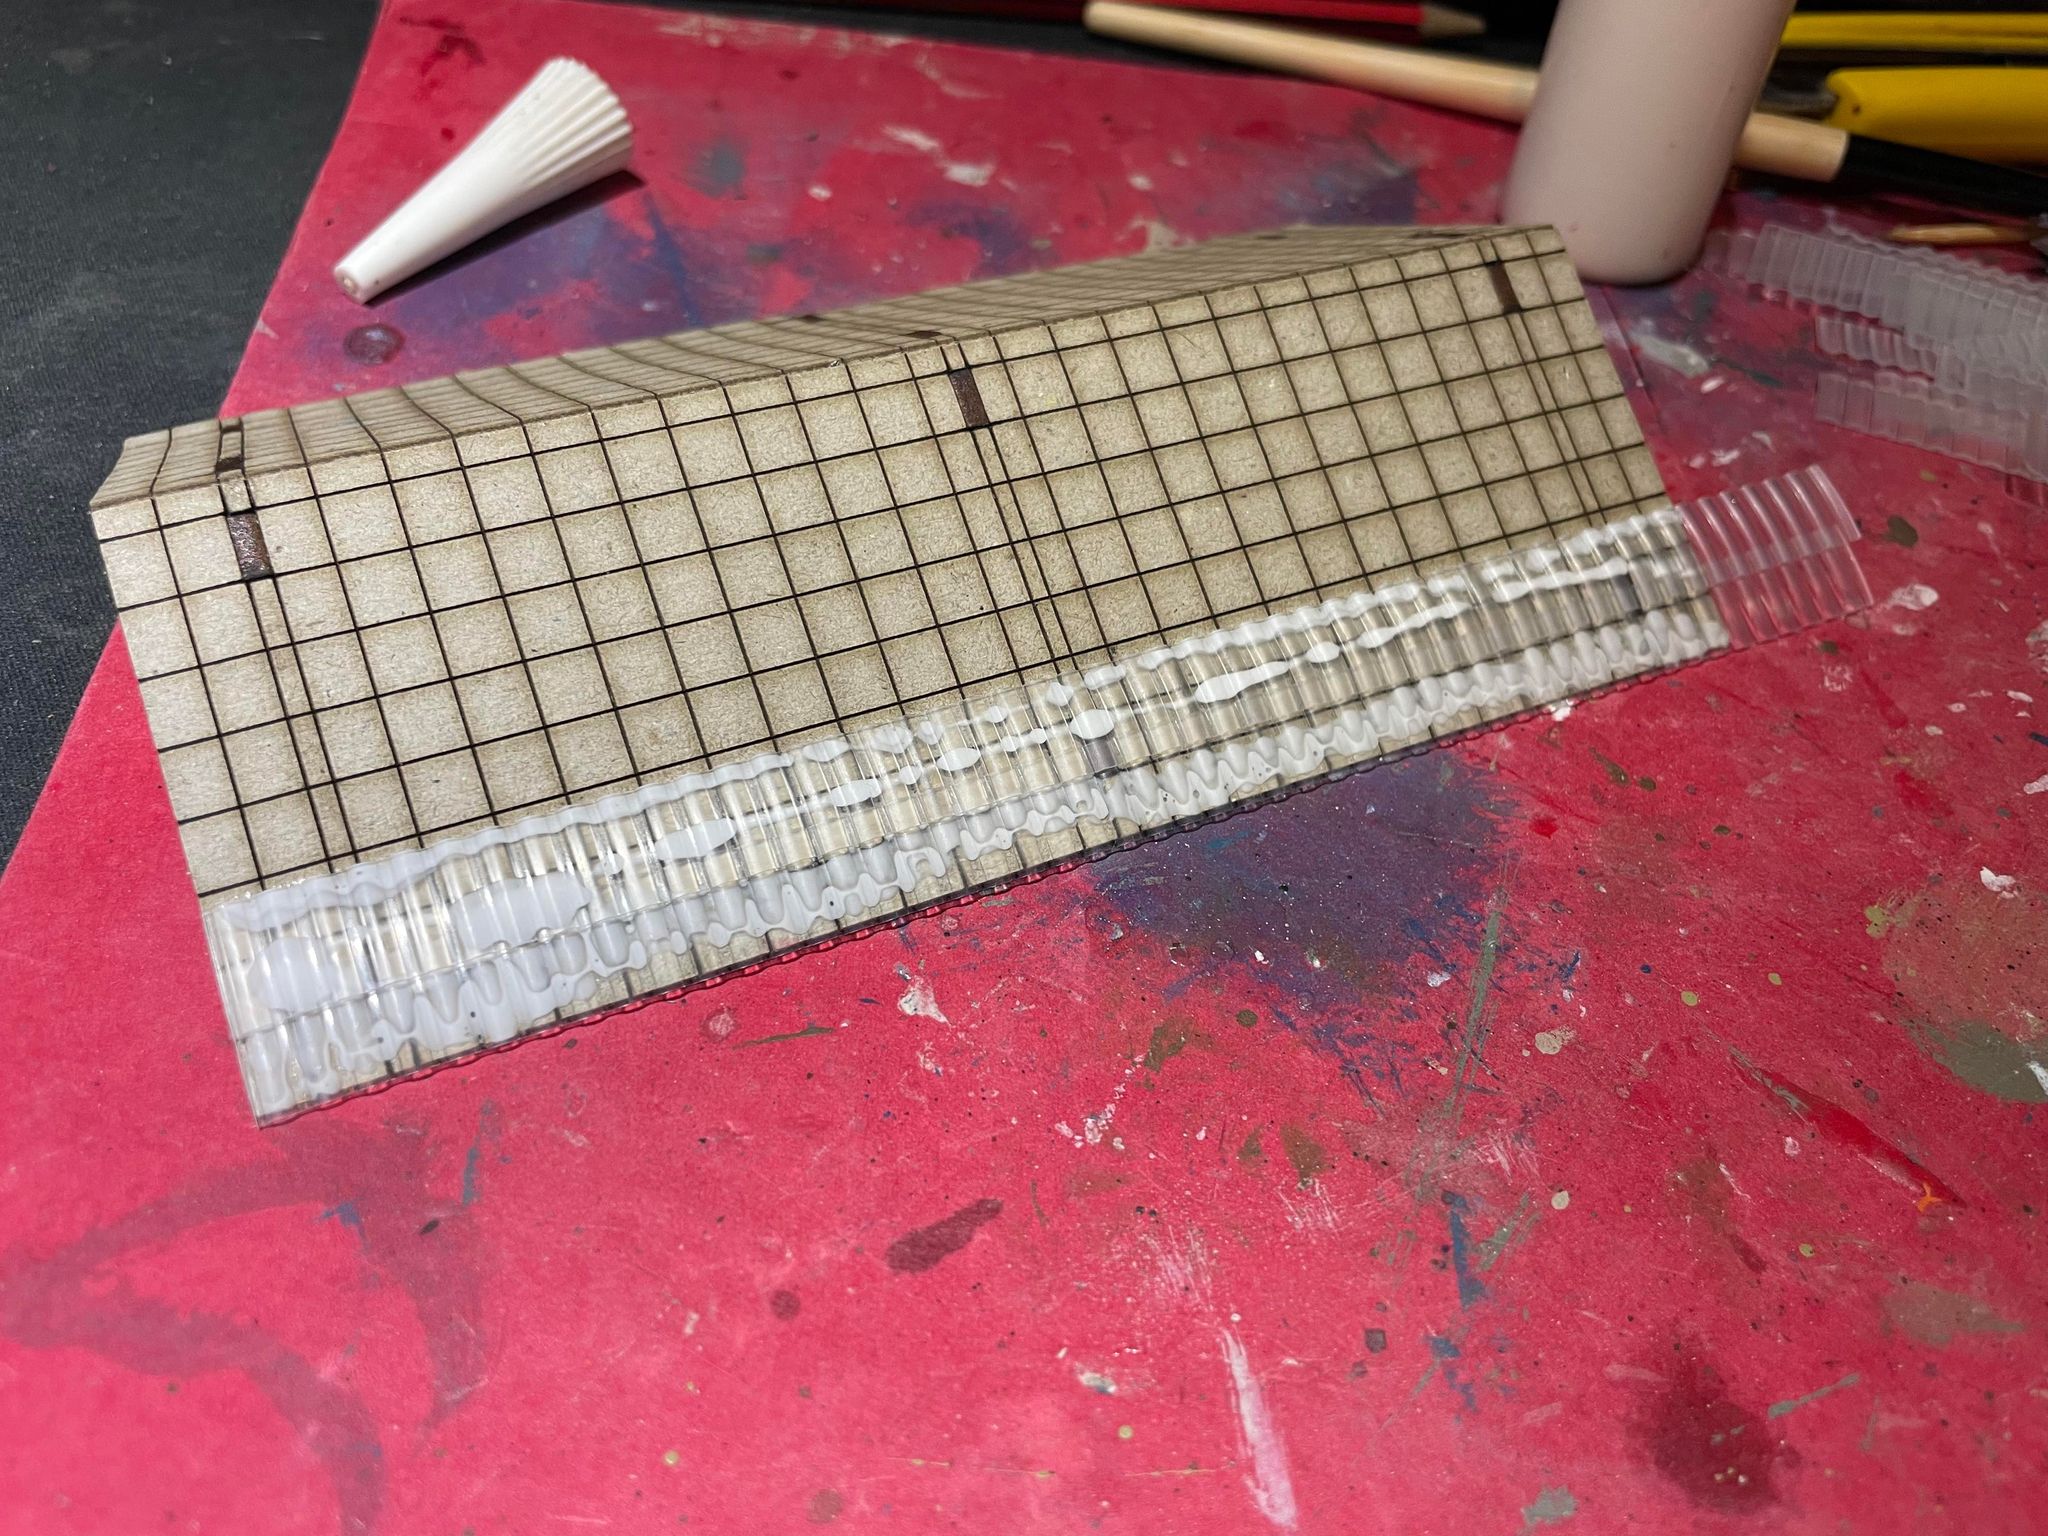
PAN-TILE ROOF
I get asked most often about how I do the pan-tile roofs and really the only secret to it is the material I use. The product is a "ribbed" plastic kitchen drawer or fridge liner. Unfortunately this has probably different names in the States or in the UK but I bought mine locally in Australia at Bunnings, where it is called "
Practa Clear 50X150CM Ribbed Kitchen Drawer Liner" for the princely sum of 5 AU. A single roll will be enough to do a lot of roofs.
As pointed out to me, these tiles are not historically accurate for the period but again this isn't a museum piece and frankly as long as they look Roman enough I don't care. Compared to buying authentic looking plastic sheeting this stuff is almost free and a much better option than corrugated card board in my opinion. Achieving the final effect consists of very basic techniques.
 |
Ribbed kitchen drawer liner in it's natural form.
|
 |
Use a cutting mat to cut the liner into long 1cm wide strips.
This stuff is a little hard to see so you have to be accurate.
|
 |
You will need close to 10 strips for each side of the roof.
|
 |
Glue each strip one at a time (I use PVA), just like laying cardboard shingles. The strip above sits half over the strip below. Ensure not to "stagger" the strips - the tiles should line up vertically.
|
 |
I use the Sarissa roof lines as a guide. Be careful - because they are plastic they can slip down if you do too many rows at once. I do a couple of rows at a time, waiting for them to dry a bit before proceeding.
|
 |
Cap them off with a thin bamboo skewer and trim the tile strips to the right length with scissors.
|
 |
I apply filler to the edges to cap them off and smear small amounts of filler
randomly over the tiles to add some texture.
|
 |
To paint them I simple undercoat in black and hit them with a heavy dry-brush of a bright orange.
I leave a good bit of black showing through in areas to mimic the "patina" these tiles develop and apply a black wash in areas. Lastly I apply a coat of Modge Podge to give them a glossy finish.
|