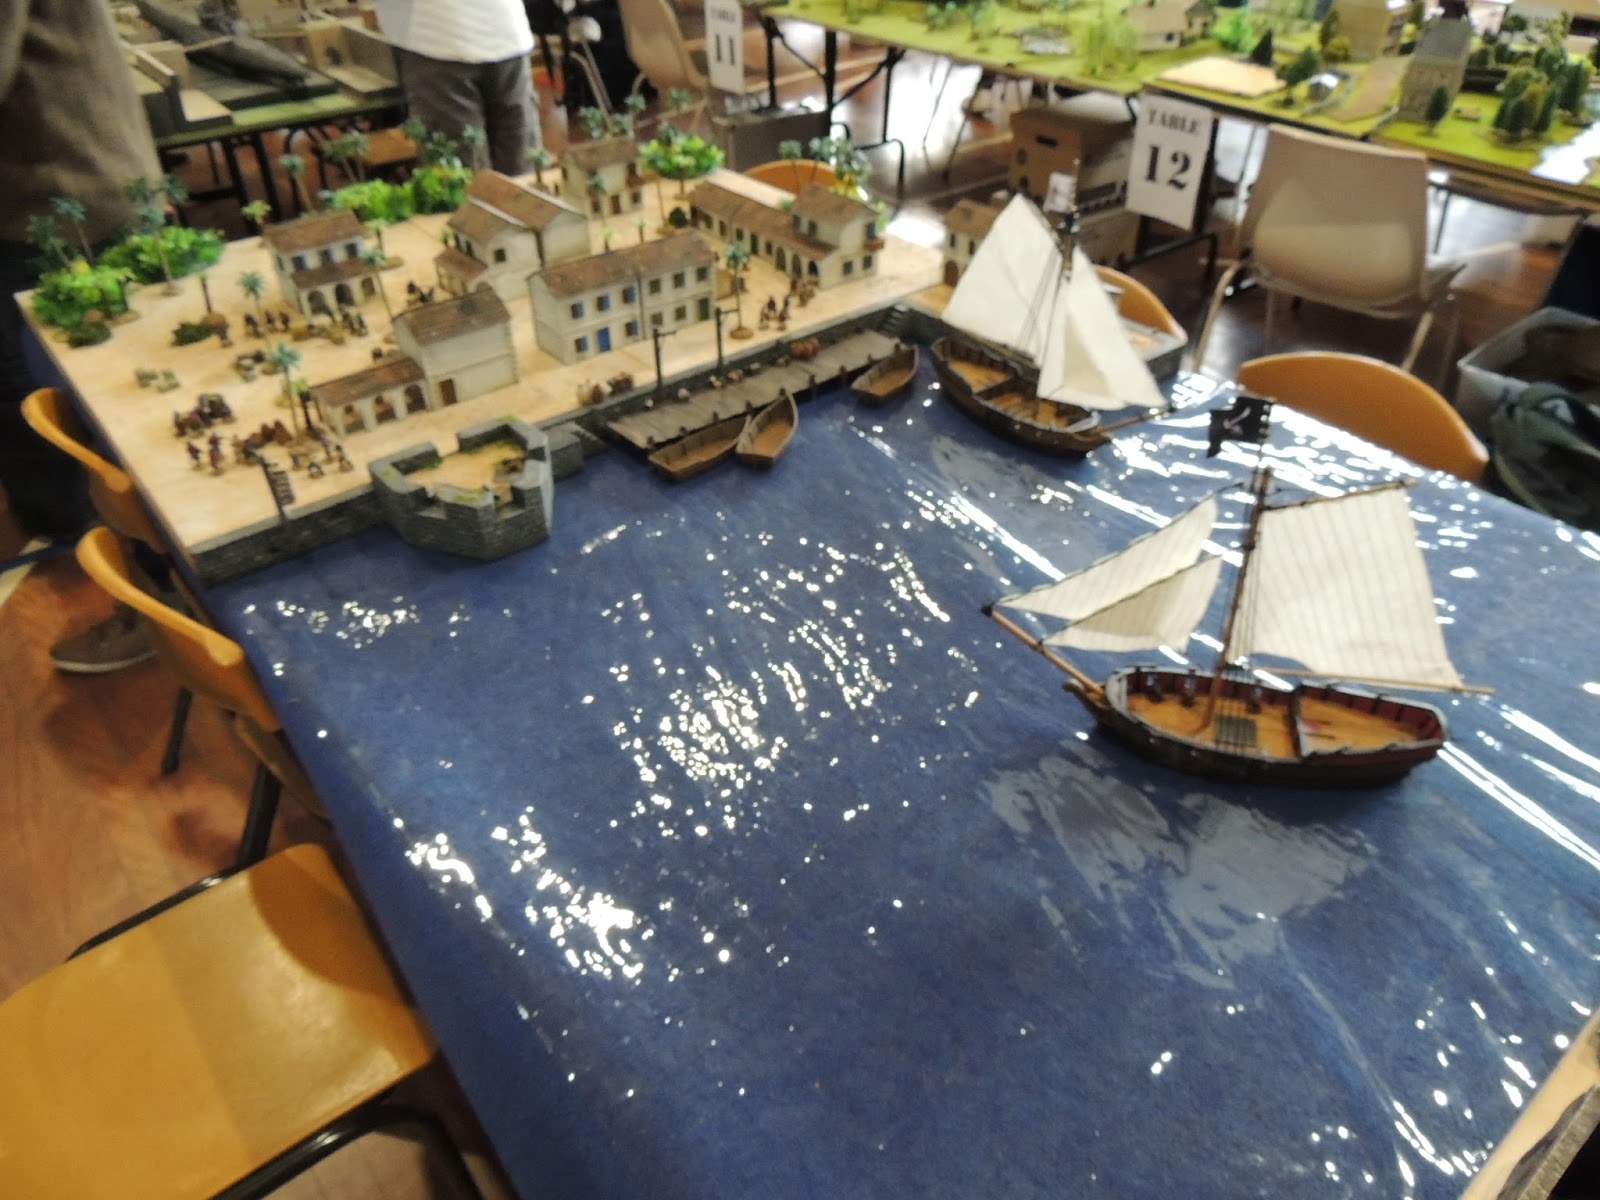
Welcome to "Adventures in Lead", a blog dedicated to the hobby of miniature wargaming. The figures and terrain on this site are mainly for a campaign set in exotic "Indostan", a distant land bearing remarkable similarities to 18th century India during the Seven Years War. Bits and pieces from other projects may pop up here as well from time to time, including colonials, gladiators, pirates, dinosaur-hunting and even some RPG'ing.
The actual campaign journal and after action reports for the Indostan campaign can be found on their own blog - "Indostan: The Jewel in the Crown", the link to which is found by clicking the small image below-left.
If you do find anything remotely interesting on this blog please leave a comment, it's what keeps these sites going and their authors motivated - Thanks for looking.

Monday, October 2, 2017

Blood & Plunder: MOAB 2017

So MOAB is now over and was a great success. I couldn't blog any further progress on the build because I was really pressed for time.
In the end I had a week to make around 14 MDF buildings from The Rook and Raven, which I hope to revisit soon and show a detailed tutorial on. These buildings will be available publicly soon, but feel free to contact Adam who will be able to give you some further details.
Here is the finished table:


Monday, August 21, 2017

Cheap and Easy Pantile Roof Tutorial

I have had a few requests for details on how I did the roof of the Spanish warehouse. What follows is a short tutorial on the materials and method used. If you have any further questions please leave a comment below.

NOTE: Having been asked about the availability of the Non-slip Plastic Liner I used, I can tell you locally in Australia, I have found it in both Dollar stores and Bunnings Warehouse. I did find it internationally available from AliExpress here. Hope that helps.

This is the finished piece.

Cut out an appropriate section of strong card, large enough to cover the roof.

Try to utilise a "natural" bend in your card to act as the roof's peak

A close up of the "Non-slip Plastic Liner" which should be available in any home depot/department or hardware store for a very reasonable price.

With the aid of a cutting mat, ruler and sharp blade, cut the liner into 1cm strips...

...until you have enough to potentially cover the roof.

Line up one of the strips with the bottom of the card...

...and glue it down.

Put some glue beyond the first strip of tiles...

...and place the next strip, so that it sits partially on the first strip of tiles.

Rinse and repeat, periodically checking down the edge to ensure the strips of tiles are straight and even.

Eventually you end up with something like this.
Stop your strips of tiles before you reach the "natural" bend.

When both sides are done it should look like this. Let the glue dry properly...

...and then trim with scissors.

Undercoat the tiles with black...

...and do a heavy drybrush in the terracotta color of your choice.

I use earbud tubes for the ridge cap, which sounds a lot more gross than it is.

Cut them to size and lie them in the gutter between the two roofs. Try to keep the roofs at the angle they are required for, because the capping may restrict them from bending more later.

Weather the roof by painting individual tiles in natural colors that compliment your base colors.
Viola! A cheap and easily method for pantile roofing.

Monday, August 14, 2017

Blood & Plunder: Spanish Warehouse

I have finished my first purpose built structure for Blood & Plunder, a Spanish style warehouse. The building features a removable roof and doors. The pan tile roof is made from a non-slip mat, which I will do a tutorial on shortly.


EDIT: Someone suggested I put shutters on the warehouse, which I had always intended to do, but actually forgot and got carried away painting. I have now added some shutters from Warbases. which I think improves the aesthetics a lot.


Wednesday, August 9, 2017

Blood & Plunder: Port Wall Continued


Continuing with the terrain for Blood & Plunder, I have completed another long section of port wall with a set of stairs. More of the same techniques used here and here, but I thought I'd show how simple the stairs were to make.
The port wall and stairs
Scribe the blue foam as described under the gun battery tutorial
Use the bricks as a guide and cut out the steps
You should end up with something like this
I created a small landing by inscribing a block of blue foam and also completed a length of wall
I fixed the stairs and block of foam together with PVA and the aid of some toothpicks
The three parts all glued together
The length of wall has some wooden pylons dispersed along it
I also made some "iron" rings to set into the wall, which were made by bending some small gauge wire
Painted, along with a waterline stain...
...and the "iron" ring set in place
The finished length of wall and stairs
The new section in position