Welcome to "Adventures in Lead", a blog dedicated to the hobby of miniature wargaming. The figures and terrain on this site are mainly for a campaign set in exotic "Indostan", a distant land bearing remarkable similarities to 18th century India during the Seven Years War. Bits and pieces from other projects may pop up here as well from time to time, including colonials, gladiators, pirates, dinosaur-hunting and even some RPG'ing.
The actual campaign journal and after action reports for the Indostan campaign can be found on their own blog - "Indostan: The Jewel in the Crown", the link to which is found by clicking the small image below-left.
If you do find anything remotely interesting on this blog please leave a comment, it's what keeps these sites going and their authors motivated - Thanks for looking.

Wednesday, September 29, 2010

Morituri Te Salutant - Gladiator Rules

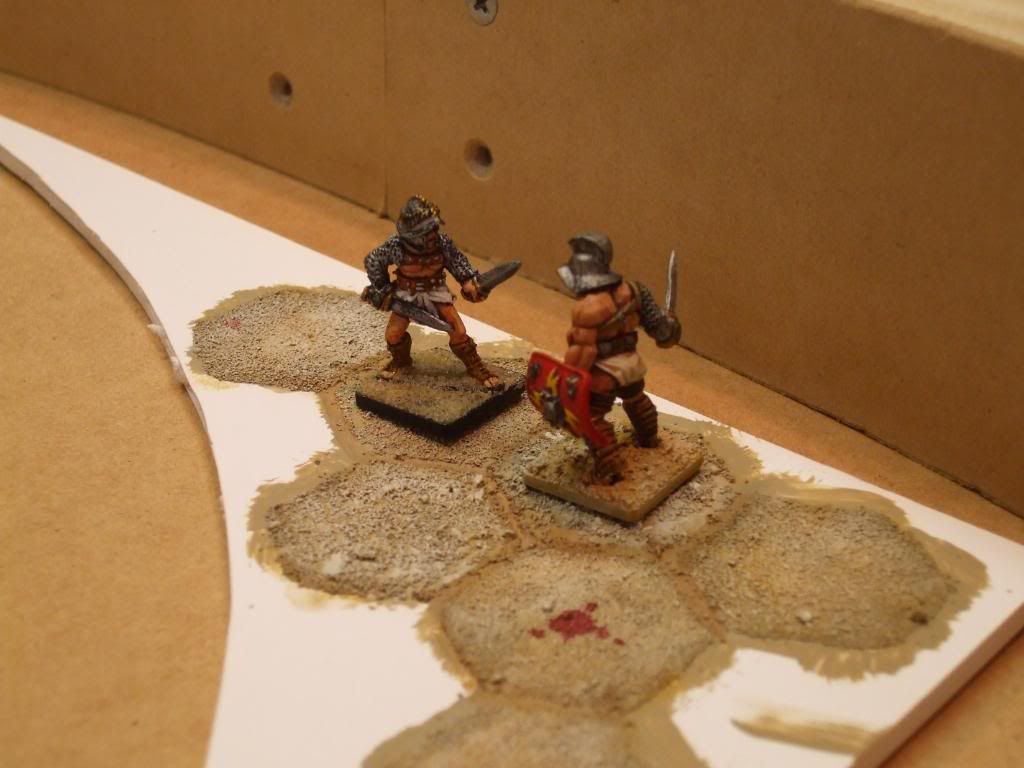
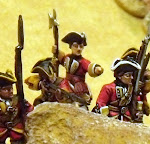
Morituri Te Salutant is a set of gladiatorial combat rules available from Black Hat Miniatures, sold in both book or PDF form. I bought the PDF a while back and only had a chance to try the rules out last Sunday at Dave's new place. 
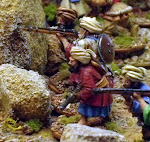
We quickly launched into a combat between a Samnite and a Thracian, two of the more common of the twelve gladiator types available. The rules were easily grasped by the players and some game tactics were quickly developed. MTS promotes some jockeying for position, which is  really good in a game with only two figures on the whole board. Other rules can result in the gladiators simply walking up to each other and exchanging blows.
The rules IMHO really achieve recreating a gladiatorial combat between two combatants well. Lose the initiative and your opponent controls the flow of the combat. Choose the wrong move and the other guy may  just skewer you. Suffer a heavy hit and the fight is as good as over. Fall down and good luck getting up with your pancreas in place. All pretty realistic results. So all in all a pretty good ruleset.
I have a few gripes. Firstly the rules are a little scattered throughout the book and you need to flip back and forward in search of the more obscure ones - which is admittedly common to many other rule books. The use of tables and matrix's are a little dated, and although they did work, I would have liked to see something a little more elegant. Although the maneuvering of the combatants was good it could lead to some pointless dancing around which resulted in some pretty boring breaks in the action. We were reluctant to just close with the enemy when we knew he could be waiting to cut us down. Again pretty realistic but did it make for a fun game? We also had a go at a multiplayer (3 gladiator)  match as well and had to abandon it because of time, but it was looking like being a long drawn out battle of maneuvering with little real action.
I have created some cards for MTS (something the game was sadly missing) that greatly improves the speed and playability of the game. I am handing them over to Black Hat Miniatures and they should appear in their downloads section in the near future. (They are available now - get them HERE)
So to sum up, I recommend MTS for one on one gladiatorial combats, but anything larger could be a problem.

Friday, September 10, 2010

WIP - The Arena Part 5

I've finished adding the sand to the hexes, only leaving spaces where the gateways are to be placed. This was a pretty time consuming job, individually applying glue to each hex, sprinkling with sand and then getting rid of the excess, over and over and over again. (Click images to enlarge)

The hex grid was then permanently glued into place and heavily weighted to ensure it would stay flat and level. I filled over the screw heads and filled some of the larger gaps at the base of the wall with Pollyfilla. Finally I attached the first of the gateways in place. It is really starting to look like an arena now.
The Announcing Gate in place.
The arena taking shape.

Saturday, September 4, 2010

WIP - The Arena Part 4

I want 3-4 main entrances to the arena, where gladiators, beasts, chariots etc can enter and leave. Looking at some real world arenas for inspiration, I've learned that most have an entrance at either end of the oval in a recessed area. I really like the look of these, but unfortunately due to the design of my curved walls, I'm unable to reproduce a similar recessed doorway. In hindsight I could have allowed for this when building the initial frame, by making the curved wall sections in 4 pieces rather than 2, and leaving a gap for the doorways. For now I'll ponder this a little more and concentrate on the "boxes" that protrude into the arena.
I found some awesome sketches from the Gladiator movie done by Mat Harris. The one below shows "The Announcing Platform", where the announcements for the combats are conducted. I liked the fact that this would sit directly across from the "Editor's Box", where the Editor would have the best view of the entering combatants. (Click images to enlarge)
The Announcing Platform
Of course this is not the Colosseum, so my "Announcing Platform" would be considerably less elaborate and a lot smaller. Firstly I started with the gates. I really like the crossed effect and I think it looks really Roman, so I tried to simulate that. I made a template in MS Word, printed it out and started chopping up matchsticks and toothpicks.
Gate templates and the finished gates.
 It is pretty fiddly gluing little pieces of wood together, but the template helped a lot.The whole thing did get glued to the paper but you can easily cut it away with a knife.
The gates next to a gladiator.
I decided on a simple wooden gate frame made of balsa with surrounding foamboard walls. I allowed for a foamboard recess to hold the gates firmly within the gateway.
The gateway made of balsa.
The two little guys are 15mm Greek hoplites that I bought years ago for an army that never happened. I liked the look of a couple of warrior looking statues flanking the gateway so incorporated them into the design.
It all fits snugly.
The "Announcing Platform" protrudes about 6cm into the arena. The sides are simple foamboard with a cut out window filled with sturdy "fly swatter" bars.
The sides with "fly swatter" bars.
Here is the whole thing assembled. I added two balsa plinths to sit my statues on to either aside of the gateway.
The completed gateway of the "Announcing Platform".

Thursday, September 2, 2010

WIP - The Arena Part 3

Having decided to use foamboard for my arena floor I plunged into the daunting challenge of covering it with hexes. The first step was to duplicate the oval shape of the arena so I could cut it out of the foamboard. To do this I undid the the screws holding the arena walls within the frame and got my self a large piece of thin cardboard that fitting the space near perfectly. I replaced the arena walls and screwed them in place over the thin cardboard, thus giving me a perfect template to trace around. When I was done tracing, out came the screws again and I lifted out the cardboard and simply cut around the penciled in shape, to give me a perfect oval template. Pinning it to my foamboard I transferred the shape onto it and begin the task of cutting around it.
I must admit I do not like cutting foamboard - especially curves and unfortunately an oval is ALL curve. I tend to cut the top layer of cardboard first and very accurately, then proceed in small section to cut through the foam and bottom layer of cardboard. It is very important to keep your blade straight. Eventually the task was done and I did a decent job if I do say so myself (pats self on back). I tested the foamboard base in the arena and it fit like a glove - Hurray!
Having already marked a dead center spot on the foamboard I grabbed some dress making pins (from my dress of course) and proceeded to pin down my hex sheets (see Part 2). (Click images to enlarge)
The cut out oval with hex sheets in place.
Then with a deep breath I plunged into scribing the hexes onto the foamboard. Under the lights at first I thought I was not pushing hard enough, but when the foamboard was at an angle they stood out very clearly. This was pretty laborious and took a good 4 or so hours spread over two days. I was VERY relieved when it was finally completed.
As an after thought I came up with the idea to include some removable hexes in the arena floor to include such things as pillars, pits, trapdoors etc. I always like to make my terrain pieces as flexible as possible., so having the ability to swap out some key pieces is very important to me. I cut out a roughly 2" square around 4  evenly spaced hexes.
The 2" holes. You may be able to make out the scribed hexes.
The next step is designing and making the arena's doorways and entrances.

Wednesday, September 1, 2010

WIP - The Arena Part 2

The next stage I tackled in my arena build is probably the most important part, the hex grid playing surface. Most gladiator games  I have come across use a hex grid, so I looked into this part carefully. The general consensus on many sites was to trace or score a hex grid pattern directly onto the playing surface. Although there was also mention of gluing pre-cut hexes (most likely plastic miniature bases) to the play surface, but I just thought this method left too much room for error in the placing of the hex pieces. 
Deciding on the first method, I looked into the material to make the playing surface from. My first choice and thought was blue foam being strong enough and easy to mark the hex grid on. Unfortunately the only foam I had to hand was 25mm thick, and when laid in the bottom of my arena shell, brought the floor level too high for my liking. I didn't want our gladiators bounding over the wall in a single leap! The next best option was foamboard - strong and only 5mm thick. My only worry was scribing the hex grid sufficiently into the cardboard surface. I was going to need to test this out and required some hexes to do it.
I found my way to incompetech a VERY useful site that allows you to generate all kinds of wonderful types of graph papers in PDF format for FREE. After a bit of experimenting I found a good hex size (2cm) for my liking and printed out a stack of these. This site is a roleplayers/wargamers dream for map making ventures and the like.
With a scrap piece of foamboard I pinned a hex sheet down and began scribing. The tool I used is a craft tool (I have no idea what they are called) that can be seen in the first picture of my arena in Part 1. It is basically a pen like tool with a small metal ball at either end. It is gentle enough not to tear the foamboard's cardboard while scribing the hexes. Thankfully the method worked and I set about texturing and painting it to see how the hexes would stand out. (Click the images to enlarge)
My hex test
I gave it the standard drybrushing I've used on my Indostan stuff, being a light sand color and  went over the outline with a darker brown wash. Satisfied that the hexes looked clear enough, I was happy to proceed and tested out some blood stains with  a GW wash as well. I couldn't help putting out some of my little gladiators to test out the hexes!
Hey this things not finished - get us off!
Although labor intensive I'm convinced that I'm capable of reproducing the hex playing surface in this method. The next step is to shape and scribe the whole bloody area (no pun intended)!